Home / Blog / Image Translation / Video Translation / Support / Donation / RSS
How to Scan Negatives
Photos taken with old film cameras usually leave behind negatives (film) after being developed and printed at a photo lab. I recently came across quite a few of these negatives. The negatives contain a type of silver salt that is highly light-sensitive. Standard negatives are 35mm wide and 24mm high, and the developed content is inverted.
Because negatives are very small and have an additional orange mask (color cast), digitizing them is not an easy task. A common method is to use a professional film scanner. If a scanner isn’t available, you can also use a mobile phone or a camera to “scan” them by photographing.
Photographing with a Camera
-
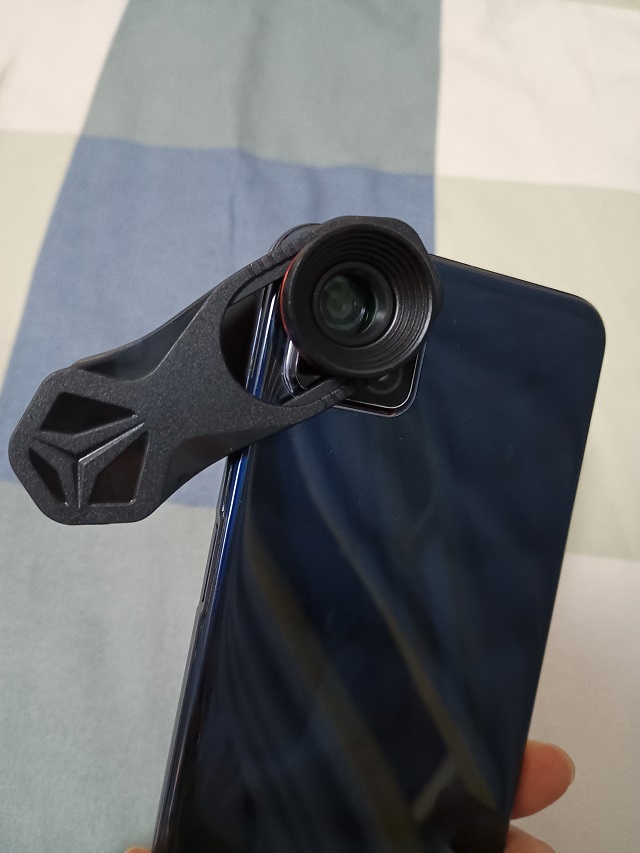
Negatives are transparent and require transmitted light to reveal the image. You can prepare a white light source, such as a phone screen or a ceiling light.
-
Use a macro lens to take the photo. For a mobile phone, you can attach an external macro lens.
-
After shooting, use software like Adobe Photoshop for further processing: inverting the colors and using the “Auto Color” function to remove the orange mask.
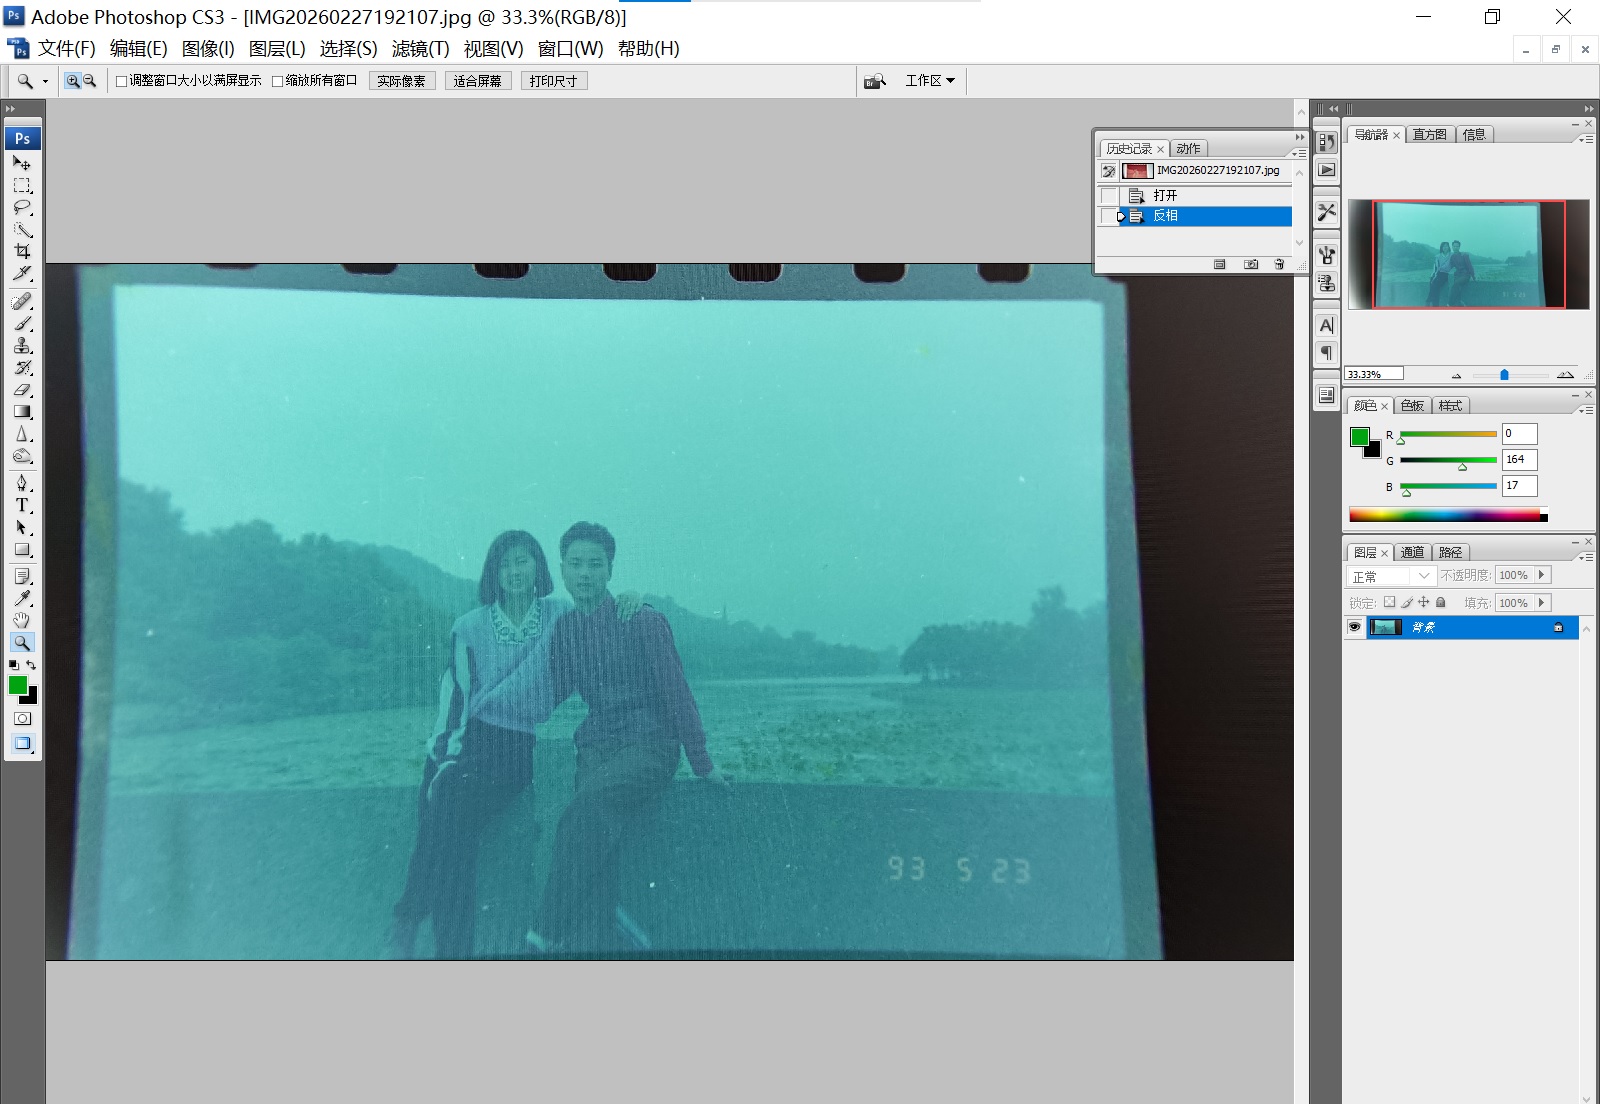

Since a mobile phone was used here, there might be issues like insufficient sharpness, inaccurate colors, and screen moiré patterns. Using a professional camera would yield much better results, potentially offering greater sharpness than some scanners. Additionally, professional cameras can save files in raw format, which is more convenient for color correction.
Scanning with a Scanner
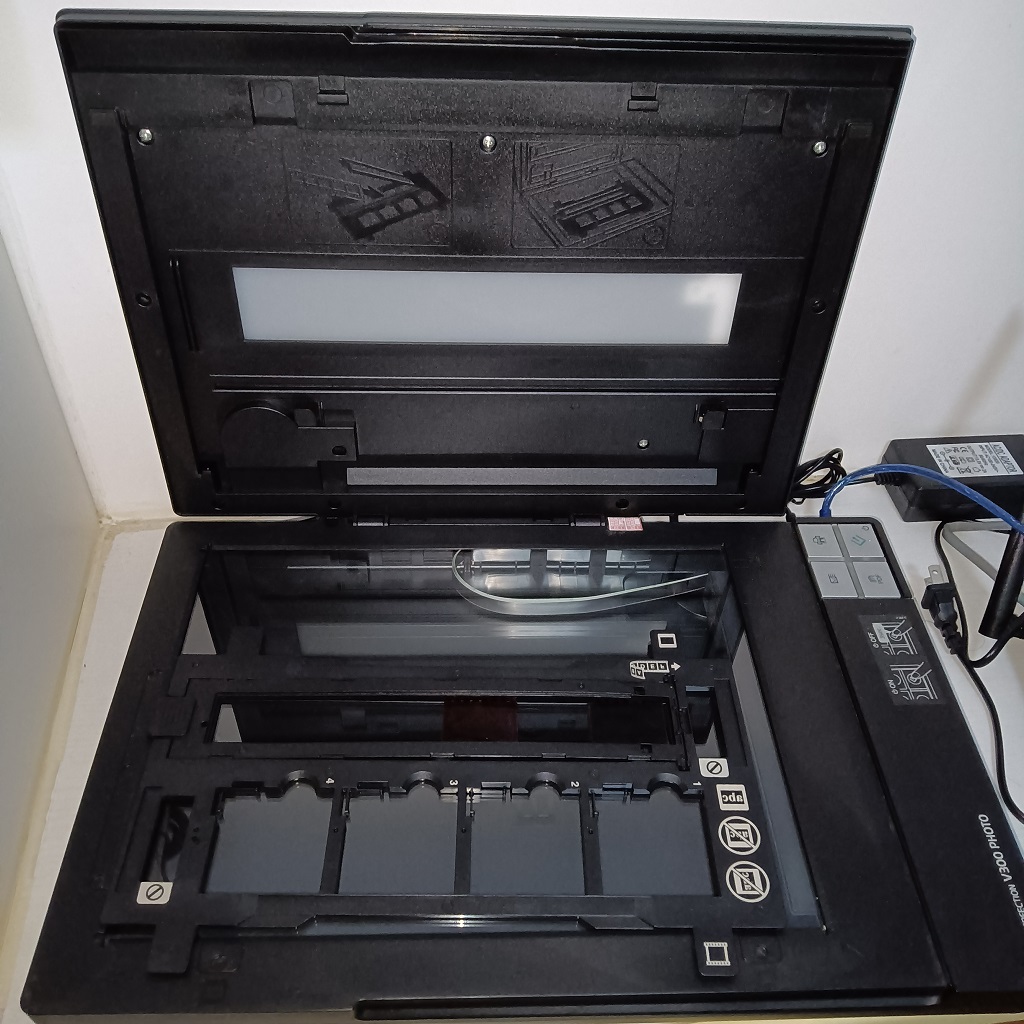
Choose a flatbed scanner that supports scanning negatives, such as the Epson V850. The one I used here is an Epson V300, which comes with a transparency unit and film holders, making it suitable for scanning negatives.
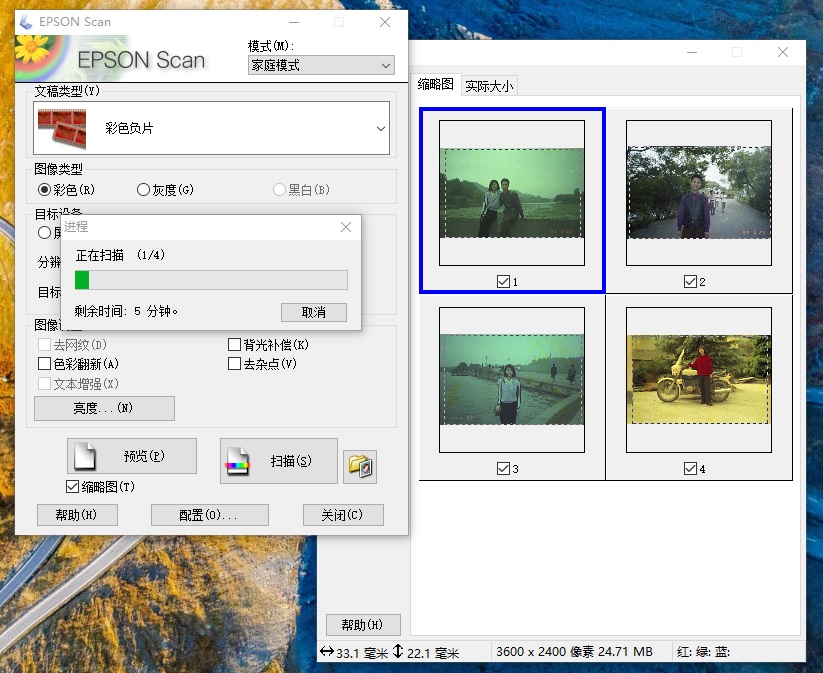
You can use the manufacturer’s software, like Epson Scan, to scan. It can automatically crop negatives, invert colors, and remove the orange mask.
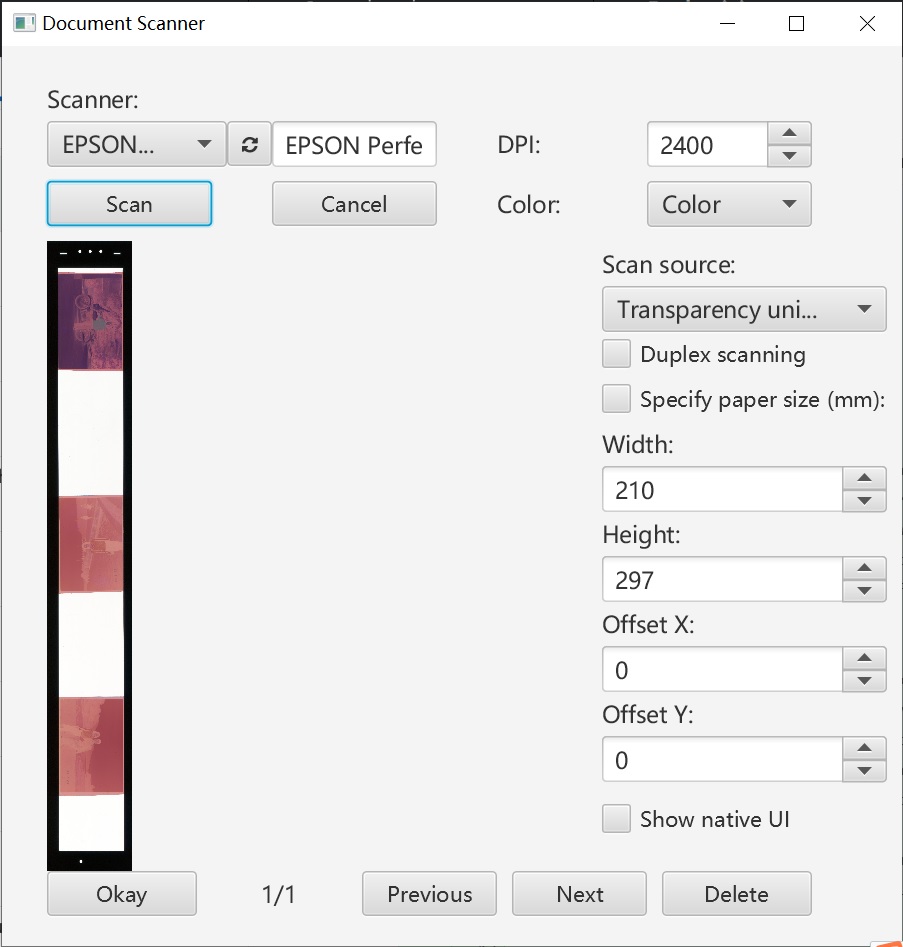
If you prefer to obtain only the raw scan data, you can use software like ImageTrans to control the scanner via interfaces such as TWAIN, ICA, or SANE.
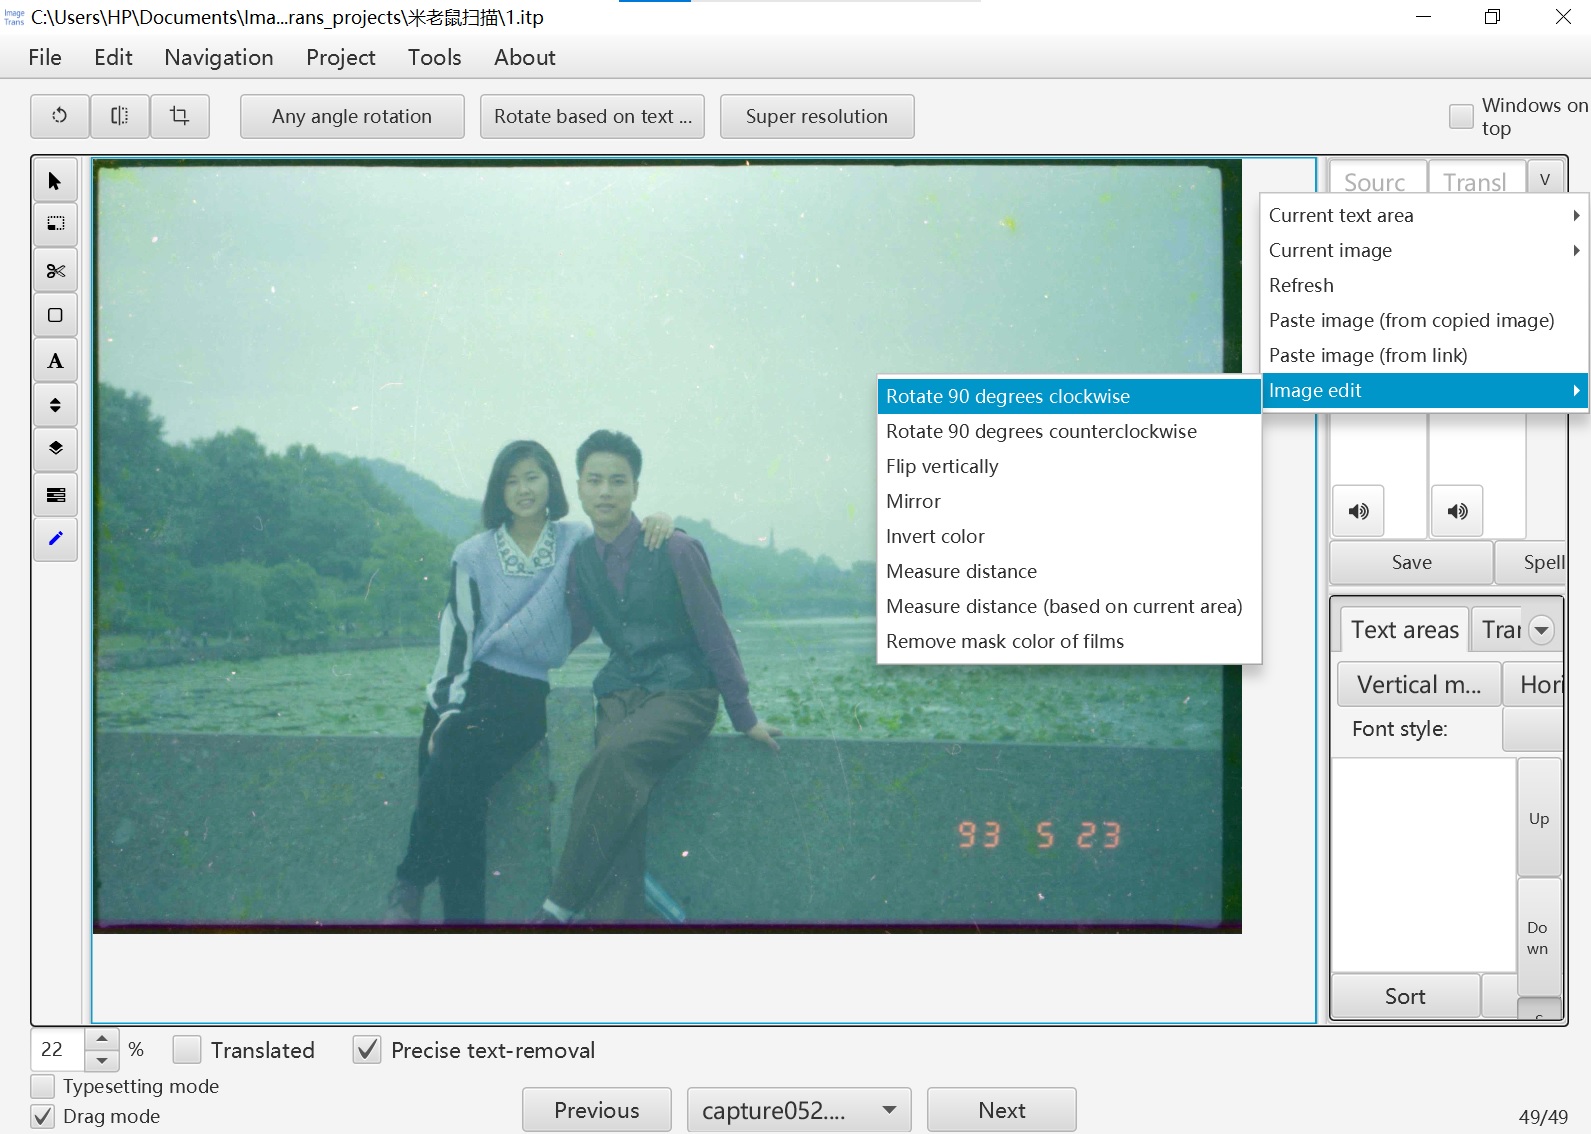
Afterwards, you can use ImageTrans or other software for cropping, inverting, and color correction.
Scanning using ImageTrans:
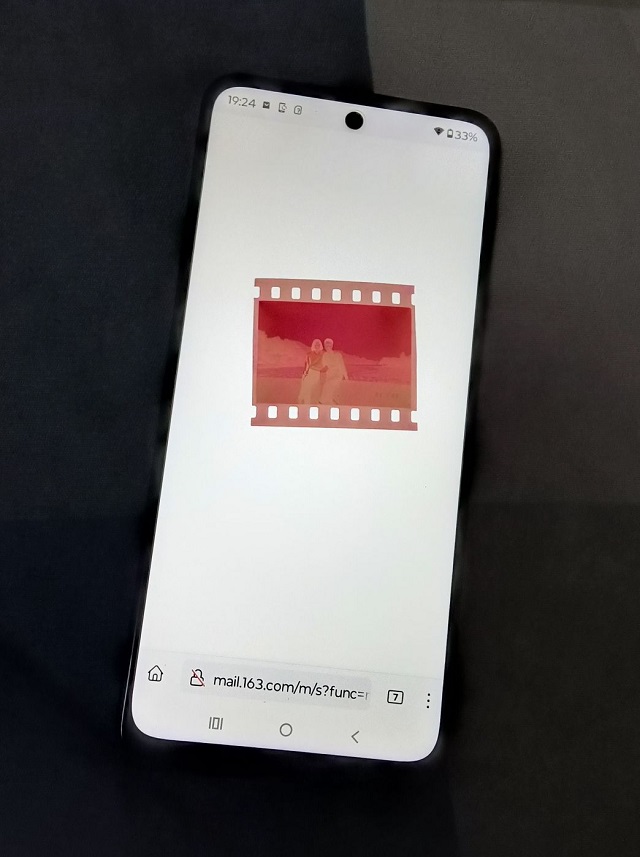
Result after cropping, inverting, and color correction using ImageTrans:
© 2026 BasicCAT ― Powered by Jekyll and Textlog theme